Showing posts with label wood working. Show all posts

Saturday, 31 August 2019

Workshop Upgrade: Electronics Workstation in a Box

Mystery Box
     After doing a bunch of Electronics work on a recent project and having to chase my tools for such work though four or five toolboxes, I thought it was time to build something dedicated for such projects. After doing some research, I found inspiration in this 'Portable Electronics Workstaion' over on Instructibles, in particular the fold-down lid/worktop, so that got integrated with the design.


Initial tool layout inside the box
    Constructing the actual box was fairly straightforward, it's just some leftover birch plywood that was in the woodrack, cut to size and screwed together with some 2 inch 'deck screws', nothing fancy but it's very sturdy and I can dismantle it with a screwdriver if I ever want to change something. The hinges are thing:2401035, and the latches are thing:2425378, both fairly nice designs that work quite well with the handle being custom work of my own. I'm using one of the leftover steel plates from the Mega Kossel's old form as a working surface, flipped over the back is plain steel, plenty sturdy enough to handle a stray iron or other hot tool, I've just used some spare screws in pairs at the corners to clamp it to the inside of the lid for easy storage.


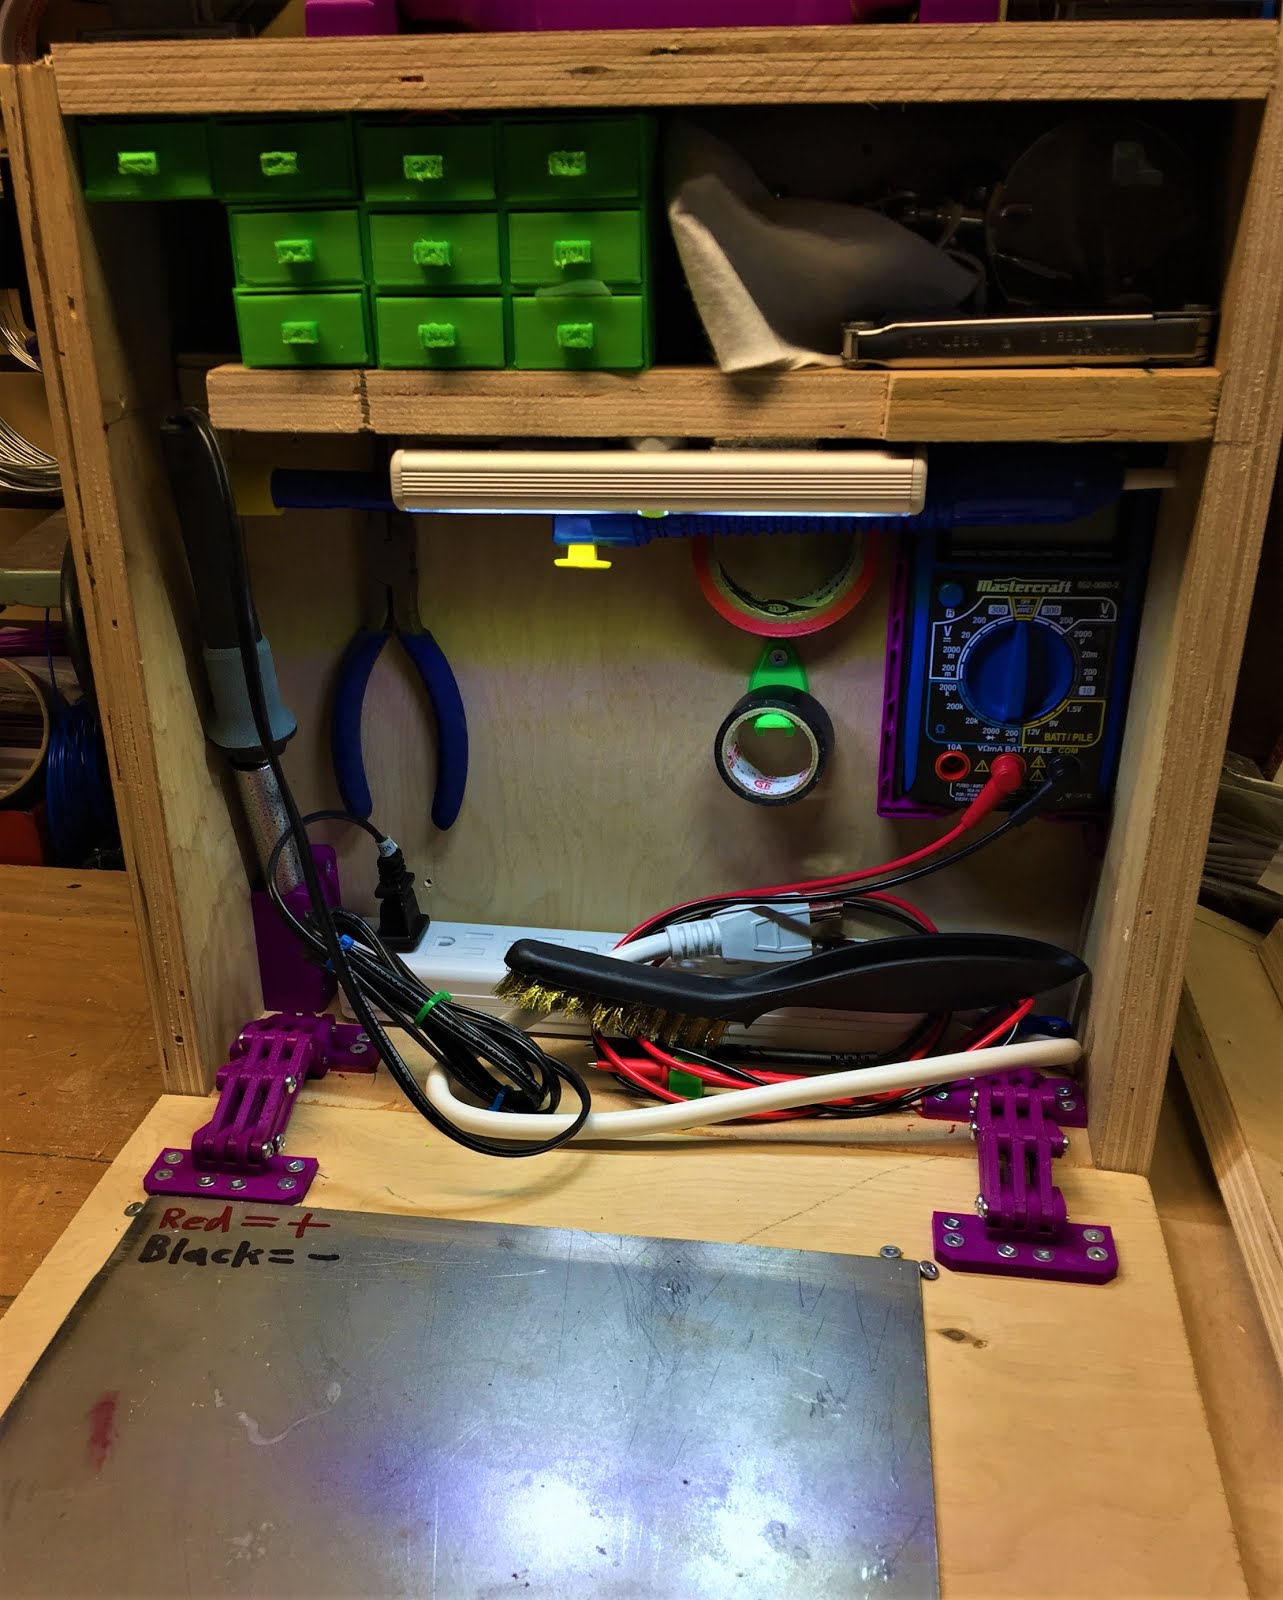
Second iteration of interior layout
    As for what's in the box, I've got my larger multimeter in the right-hand corner, then some hooks for electrical tape (thing:2900008), my soldering iron in a custom stand on the left, power-bar to control the iron along the bottom, and some needle-nose pliers and a multi-tool on the back wall. Just below the shelf is my de-soldering pump and an LED 'work-light' type flashlight, then some custom drawers on half of the shelf above. The drawers are filled with small consumables like heat-shrink tubing and solder, stuff that gets used all the time in small amounts during projects.


Fume extractor parts
    On the safety side, I've got a cheap filter mask just above the iron, along with a custom built fume extractor on the upper shelf. Parts wise, the fume extractor is a 6025 12V fan that was leftover from the airfiltered enclosure build, along with a section of a commercial fume extractor filter cut down to fit. I created a custom enclosure in Fusion360 to fit the fan, then printed the parts out and bolted things together.


Fume extractor with fan installed, filter waiting for installation
    Power is fairly simple, I've got an adapter for the batteries for my power drill that takes a 2.5mm barrel jack, so I just fitted a spare plug to the fan's power leads, simple and easy to maintain. The actual filter is activated carbon with a custom holder, it's secured with some M3 bolts for ease of replacement whenever needed. 


Completed Fume extractor ready for use
     Overall, I'm happy with how this workstation/toolbox turned out, it should make any future soldering and electronics projects much easier and safer going forward.


Completed toolbox ready to use.

Wednesday, 12 June 2019

Workshop Upgrade: Building a folding center bench.

3/4" hardwood plywood 
    Past month has been busy, had a couple of family projects to do, one of which resulted in a large stack of leftover plywood looking for a project. After tripping over the old plywood on sawhorses bench one more time, I decided it was time to replace it with something better suited to the job.


Workbench hardware, green brackets are thing:1259505
    Sorting through the stack revealed a pair of panels that combined to form a 30" by 84" worktop, a nice size for working on large projects but a bit cumbersome for my workspace all the time, so I needed to find some way of fixing that. Looking through my hardware bin turned up a 30" piano hinge, so I decided to make one side of the bench permanent and the other a folding extension that could be collapsed when not needed. More digging through the rafters turned up a couple lengths of 2" squares stock that could be cut down into legs and I was starting to get a feel for what my options were, so I fired up Fusion 360 to do some rough planning.


Rough design in Fusion 360
   Measuring the available materials fixed the workbench total height at 35" tall, so the design in F360 was useful for figuring out what length to cut the legs, along with providing a solid framework for the basic form. The old diagonal bracing angle iron from the Mega Kossel's previous frame proved to be exactly the right length for the long side bracing and shelf supports, so it got bolted onto the legs to help stiffen things. Bracing for the short sides is a couple lengths of 1/4" plywood that were in the stack, these also double as mounts for the 2.5" caster wheels.


Workbench assembled and folded
    Once the bulk of the assembly work was finished, it was time to give some thought to what type of finish to give the top, something hard-wearing and durable was needed, so I ultimately went with some semi-gloss Varathane that was leftover from another project. it's got 1 coat on all sides so far. Seems to be holding up fairly well, and I've got plenty more if it needs another coat later after some use.

Unfolded with first coat of Varathane drying
Folding Section Leg
    For supporting the fold-out section of the work-top, I was playing with a bunch of different ideas, but ultimately I decided to create a bolt-on leg that will clip to the underside of the worktop when not in use. This meant that I needed something light but strong, some leftover aluminum tubing from the Mega Kossel 2.0 fit the bill perfectly. The longest section that I had on hand was slightly short but I just modified the design for the mounting bracket and foot to account for that.

3D printed foot for folding section support
Folding support leg mounting bracket
    I'm fairly happy with how the leg came together, the printed parts were intended to have M5 bolts used to secure them but the fit as printed turned out to be nice and snug with friction alone, so the entire leg can be broken down without tools if needed or if something breaks at some point. There's a bit of a teaser for a future post in the mounting bracket for the leg, those are the former bed levelling knobs off my Ender 3 being used as wing-nuts to hold things in place, but more on that next time.

Tuesday, 18 July 2017

Summer Project: Upgrading the workshop

Workshop upgrades
     My workspace has been getting into a bit of a mess over the past year, so it was time for a cleanup this summer and I've ended up building a couple small projects to help with reorganizing. One's a cart for the spare that was piling up in one corner, the second is a small router table to help with the third which is a tool chest for storing all the small hand tools.

Wood Cart Concept
     The worst of the mess was, not surprisingly, the wood pile. After watching this YouTube video, I decided that building something like it would be the best solution for my own wood pile. Starting with Fusion 360, I drew up rough plans for a wood cart that could handle anything up to half a sheet of plywood, that's the largest piece of wood that I've got space to work with. After a trip to Home Depot to get some wood for the frame, I ended up building the final cart from a 2'x4' 1/4 sheet of plywood for the base, 4 8'x2"x2" composite posts cut to 5' and 3' sections, 4 casters, and a couple of old IKEA storage boxes that were in the shop. The Fusion 360 file is here.

Wood Cart as built with MPCNC in background
Router Table
    With the wood pile sorted, the next area that needed reorganizing was the hand tools. Previously I had them in the upper trays from some old tool boxes on a long shelf about 12 inches above one of the work benches, didn't work that great with the tools constantly getting mixed up and covered in sawdust. After seeing some YouTube videos of other tool organizing methods, I drew up a concept for a wooden tool chest in Fusion 360. (File)

Tool Chest Concept
     One issue with the design that was immediately apparent was that I'd need some form of jig or tool to cut the slots in the sides for the drawer bottoms, which double as the drawer slides, to run in. I've seen slots like this cut in a few ways on YouTube, a Dado blade set with a table saw or a router table are the most common options. I don't have a dado set but I did have a spare plunge router that was just gathering dust, so I made a simple table for it out of some stuff that was lying around the shop.

Router mounting system
Power management
     I used an old folding worktable for the legs, bolted a 2ft by 2ft square of sanded plywood on for a top. For mounting the router, I used a skill saw to cut a hole in the top that the plunge router would fit through, then used the MPCNC palm router to cut a shallow groove that would allow a 1/4" sheet of hardboard to sit flush with the top, then cut a piece to fit and screwed the router to one side after drilling a 2-inch hole for the bit to pass through. After that it was a simple matter of dropping the router through the hole, sanding the top completely flat, and dealing with the power wiring. Since the plunge router has its trigger mounted on one of the hand grips, I simply used its lock-on function to bypass it and zip-tied an old power bar to the side, plug the router into that and it functions as a on/off switch.

Tool Chest as built
     With the router table complete, it was a simple matter of firing up the table saw and cutting all the pieces of plywood and hardboard to size, using the router table to cut the slots for the drawers, and then screwing everything together. I did use a hole saw bit on the drill press to cut the notches for the drawer handles, but that was basically it for making the tool chest, and I'm very pleased with the result of both projects.