 |
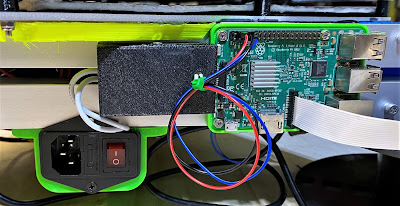
| Remote Power Setup from last time |
The hardware side has changed over to a proper Raspberry Pi Hat, mainly due to the relay from last-time glitching out once the temperature in the workshop went from 10°C average to around 20°C, something about that slight increase made the relay trigger current increase past the Pi's current output limits. This isn't covered in the data sheet for the 'JQC-3FF-S-Z' relay that I've been able to find, so your results with that relay may vary depending on the environment the printer lives in. I've upgraded to the Keyestudio 4 Channel Relay Hat which uses relays that actually play nice with the Pi's onboard current limits, installing it was almost plug-in and go, only needing to screw the load lines into the terminal blocks to finish hardware installation.
 |
| Updated Settings for PSU Control |
On the software side, the creator of the 'PSU Control' plug-in did a major overhaul of the code-base in April, end result was it splitting into 3 plug-ins. The original which is now basically the switching logic for when to turn things on/off. And a pair of support plugins that act as interfaces for Raspberry Pi GPIO or TPlink smart plugs so far. Functionally this means that the 'Switching' settings need to be set to 'Plugin', and then the 'PSU Control RPi.GPIO' plugin installed via the plugin manager.
 |
| PSU Control RPi.GPIO settings |
Configuring the new plugin is fairly simple, it's really just a matter of telling what pin-mapping mode and which pin is in use for the printer relay. I'm using what the plugin calls 'BCM' mode, identifying the pins by the logic name instead of the more common 'Board' mode since it seems to be slightly more reliable. For the hat I'm using, the relays are on BCM pins 4, 6, 22, and 26. Setting up is just a matter of putting in the number for the relay in use, 4 in my case, and setting the logic to inverted since I've wired the printer as 'normally closed' and the plugin assumes the more common and generally safer 'normally open' logic by default. That concludes my follow up on this subject, next time its going to be looking modernizing an old relic from the early days of RepRap based printing.
