Showing posts with label Installation Guide. Show all posts

Sunday, 2 May 2021

Remote Power Control Update

Remote Power Setup from last time
     There's been some changes to the remote power setup from last post, so I've documented the updates here if anyone wants to duplicate this modification. It's primarily a hardware change but there has also been a software update to the OctoPi plugin that can be a bit confusing for new users.

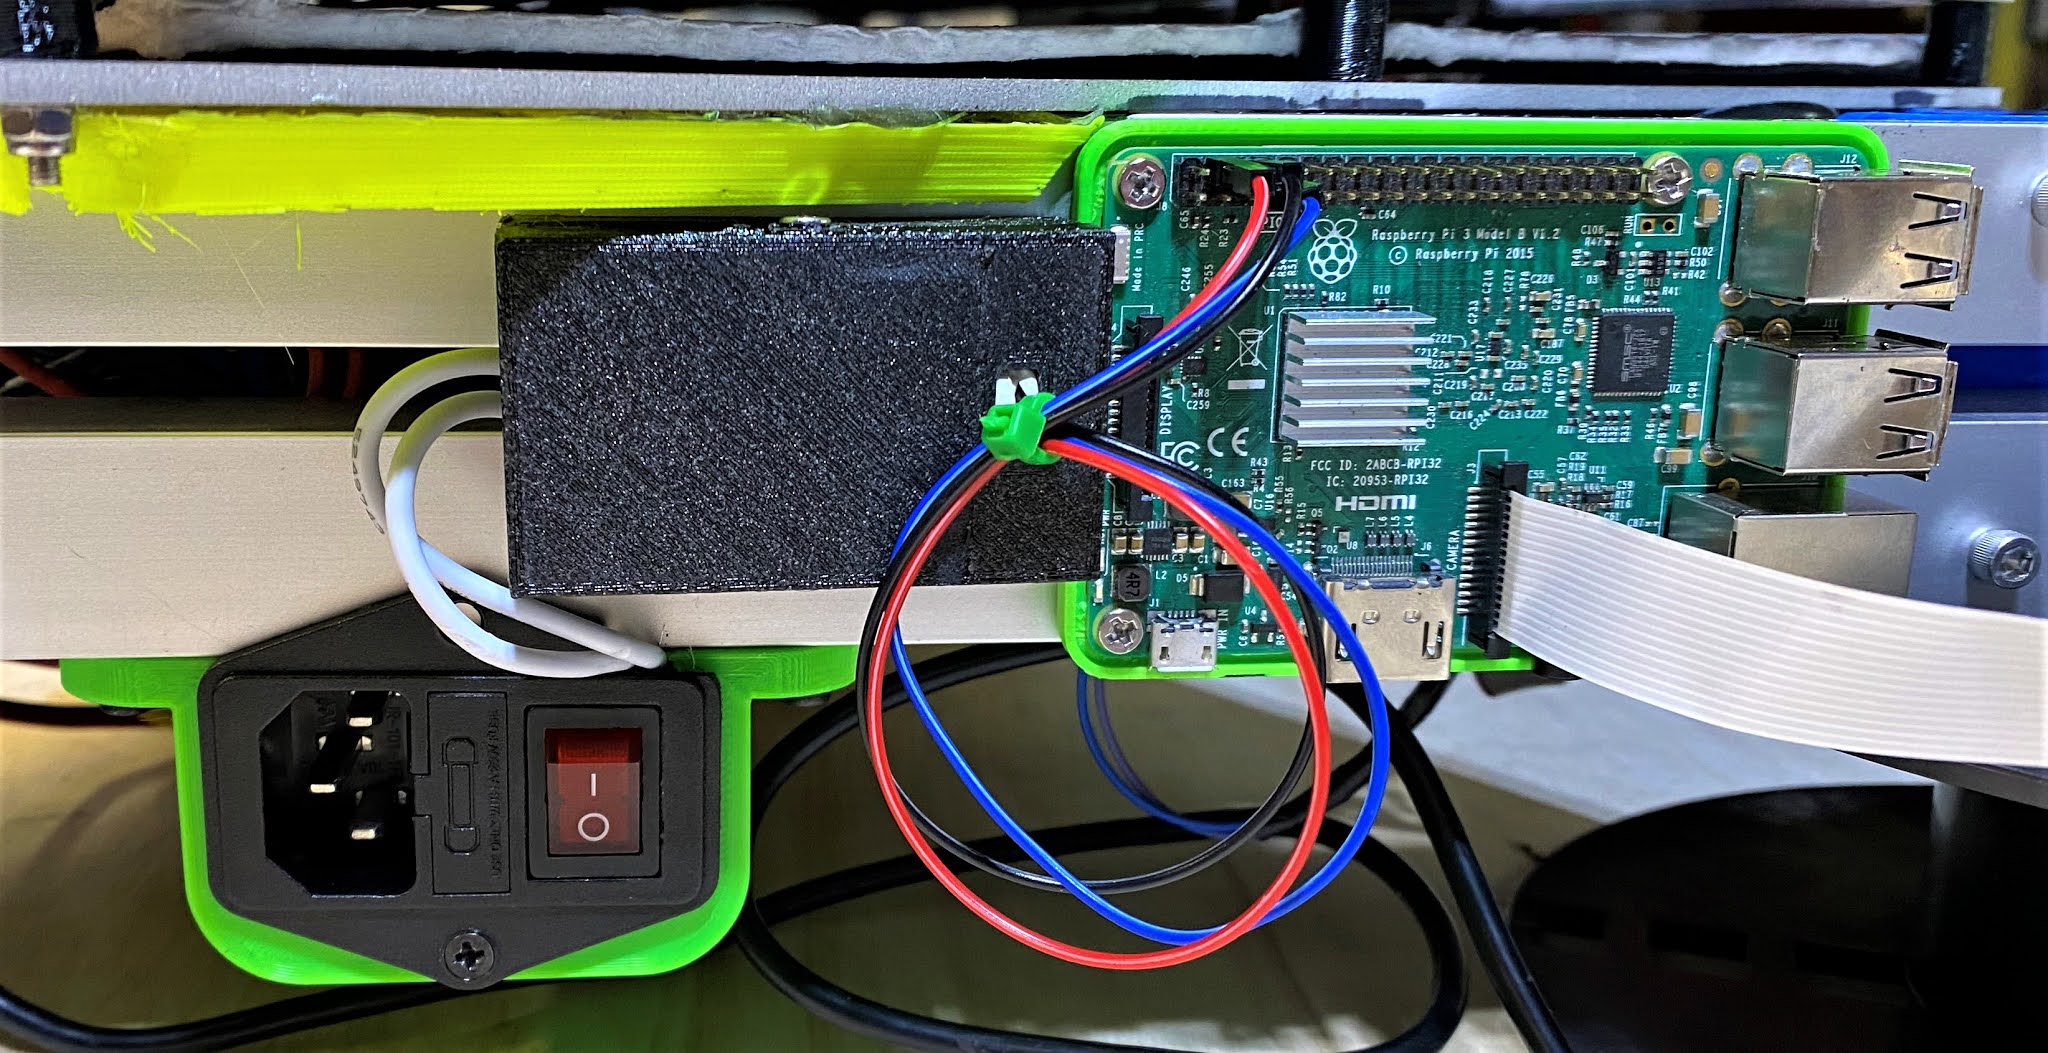
     The hardware side has changed over to a proper Raspberry Pi Hat, mainly due to the relay from last-time glitching out once the temperature in the workshop went from 10°C average to around 20°C, something about that slight increase made the relay trigger current increase past the Pi's current output limits. This isn't covered in the data sheet for the 'JQC-3FF-S-Z' relay that I've been able to find, so your results with that relay may vary depending on the environment the printer lives in. I've upgraded to the Keyestudio 4 Channel Relay Hat which uses relays that actually play nice with the Pi's onboard current limits, installing it was almost plug-in and go, only needing to screw the load lines into the terminal blocks to finish hardware installation.

Updated Settings for PSU Control

     On the software side, the creator of the 'PSU Control' plug-in did a major overhaul of the code-base in April, end result was it splitting into 3 plug-ins. The original which is now basically the switching logic for when to turn things on/off. And a pair of support plugins that act as interfaces for Raspberry Pi GPIO or TPlink smart plugs so far. Functionally this means that the 'Switching' settings need to be set to 'Plugin', and then the 'PSU Control RPi.GPIO' plugin installed via the plugin manager.

PSU Control RPi.GPIO settings

    Configuring the new plugin is fairly simple, it's really just a matter of telling what pin-mapping mode and which pin is in use for the printer relay. I'm using what the plugin calls 'BCM' mode, identifying the pins by the logic name instead of the more common 'Board' mode since it seems to be slightly more reliable. For the hat I'm using, the relays are on BCM pins 4, 6, 22, and 26. Setting up is just a matter of putting in the number for the relay in use, 4 in my case, and setting the logic to inverted since I've wired the printer as 'normally closed' and the plugin assumes the more common and generally safer 'normally open' logic by default. That concludes my follow up on this subject, next time its going to be looking modernizing an old relic from the early days of RepRap based printing.

Wednesday, 20 January 2021

Remote power control with Octoprint

10A relay module

     Over the last couple months I've been working on a bunch of secret stuff and workshop upgrades, more on those later in the year, but one project I can share is converting the Mega Kossel to full remote control via the attached Octoprint node. Out of the box Octoprint allows for the attached printer to be monitored via USB and an optional webcam, but there isn't any means of switching the printer on or off remotely, resulting in a lot of wasted electricity to maintain it in a state of 'ready to print'. The solution for this problem requires a bit of hardware modification along with installing an optional plugin for Octoprint called 'PSU Control'. I'm going to start with the suprisingly simple hardware addition first.

Tools and parts for remote power control upgrade

      The primary addition needed to control the power state of the 3D printer, (North America only), is a common 10A relay of the type found in a lot of hobby electronics kits, I'm using this one from Amazon, but there are lots of variations to chose from, it just needs to have 5V switching logic for compatibility with the Raspberry Pi. The rest of the tools and supplies are some 16/18 gauge wire, 3 DuPoint jumper lines, a couple female spade connectors, a wire-crimp/striper tool, and a couple screwdrivers, #0 and #1 Philips in my case. I've also printed a case for the specific relay module, but any electronics project enclosure will work, this is a key safety precaution since the relay will be switching mains power and the terminal block does have exposed metal on the top and front, so this modification is at your own risk.

Inside of power socket/switch with target wire removed.
     The first step is to unplug the printer and unscrew the power switch/socket assembly, this usually is just taking 2 screws out from the top and bottom holes. Once the socket is out, there are a bunch of wires that lead to the power supply, we want to remove the short section of wire that leads from the fuse to the power switch, this is going to be replaced with some leads to the relay. 
Relay polarity wiring
     Wiring the relay is fairly simple, we want it connected in the normally closed (NC) position. This allows the printer to still be used normally if the Octoprint node is offline for any reason. The other end of the 18-gauge wires should be crimped with the spade connectors, then one goes on each exposed blade in the power switch assembly.
Final Relay to Pi wiring
     On the OctoPi side, we're connecting to the 5V, 3.3V, GND, and one of the data pins on the Pi's GPIO, so you will need a 15W power block for the pi to prevent performance issues when the relay is active. Firstly I've pulled the coloured jumper and am using the relay board in isolated mode to prevent damage to the Pi's 3.3V logic systems. Full pinout is pin 2(5V) to JD_VCC, pin 1(3.3V) to VCC, pin 6(GND) to GND, and pin 13(GPIO) to IN1/Control. Of these, the only one you'll need to note down is which pin the control line is on. We'll need this number to configure the plugin in the next step.
Octoprint Settings with PSU Control installed
     Installing the PSU Control plugin is fairly standard for Octoprint, just searching 'PSU' in the plugin manager brings it up, after that it's just clicking 'install' and follow the prompts. Once the plugin is loaded, scroll down to the page shown above and switch the switching mode to 'GPIO', then enter '13' in the box below. After that scroll down to 'Power On Options' and enable 'Connect when powered on' with a 10 second delay and you're done for basic configuration. There's also a couple options to automatically shut-down the printer when idle or finished printing. These make it so the printer will stay completely dormant when not in use, ideal for when doing long prints that finish at odd hours.
Completed install before testing

Wednesday, 26 June 2019

Part Review: TMC2208 Stepper Drivers

MKS TMC2208 Stepper Driver
      During a recent maintenance session on the Mega Kossel, I installed some TMC2208 stepper drivers into the X/Y/Z sockets to replace the original drivers. Below is a short guide on how to install them on a printer board, along with my impressions after a month of use on a primary production printer.

Ramps 1.4 with TMC2208 drivers on main motion axis
    As you can see from the above picture, these drivers are meant as drop-in replacements for the popular A4988-series that the majority of 3D printers use by default, so upgrading to them works mostly the same way on any control board with plug-in drivers. The key to getting them socketed properly is to line up the pin marked 'EN' or 'Enable' with the same corner of the board socket, it's usually marked on the board, but for the Ramps-series it's the corner pin closest to the power input, centre top in the picture above. The other main change needed is to pull the third jumper in the step selector, make sure to do this before installing the driver since that pin is different between the A4988 and TMC2208 pin-outs.


    The most noticeable difference upon starting a print is just how quiet the printer is, there's barely any sound other than the actual belts moving and the cooling fans, quiet a difference from the A4988 drivers. They also have some nice effects on print quality, prints made before the upgrade had a slight ripple effect that was from minor vibrations shaking the nozzle slightly, those have been vastly reduced with the TMC2208 drivers installed.

3DBenchy post installation,
     This is the #3DBency being printed in the video clip, as you can see the ripple pattern is still present but vastly reduced, so I'm quite happy with the end result of the upgrade, minor stringing aside, I'll probably update my other printers with them eventually as well. In conclusion, are TMC/Trinamic drivers worth it? Yes if you want to make the printer drastically quieter without redoing the motor mounts or are looking to maximize print quality.