Showing posts with label household. Show all posts

Friday, 17 May 2019

Household 3D Prints: Kitchen Knife Block

Kitchen Knife Block
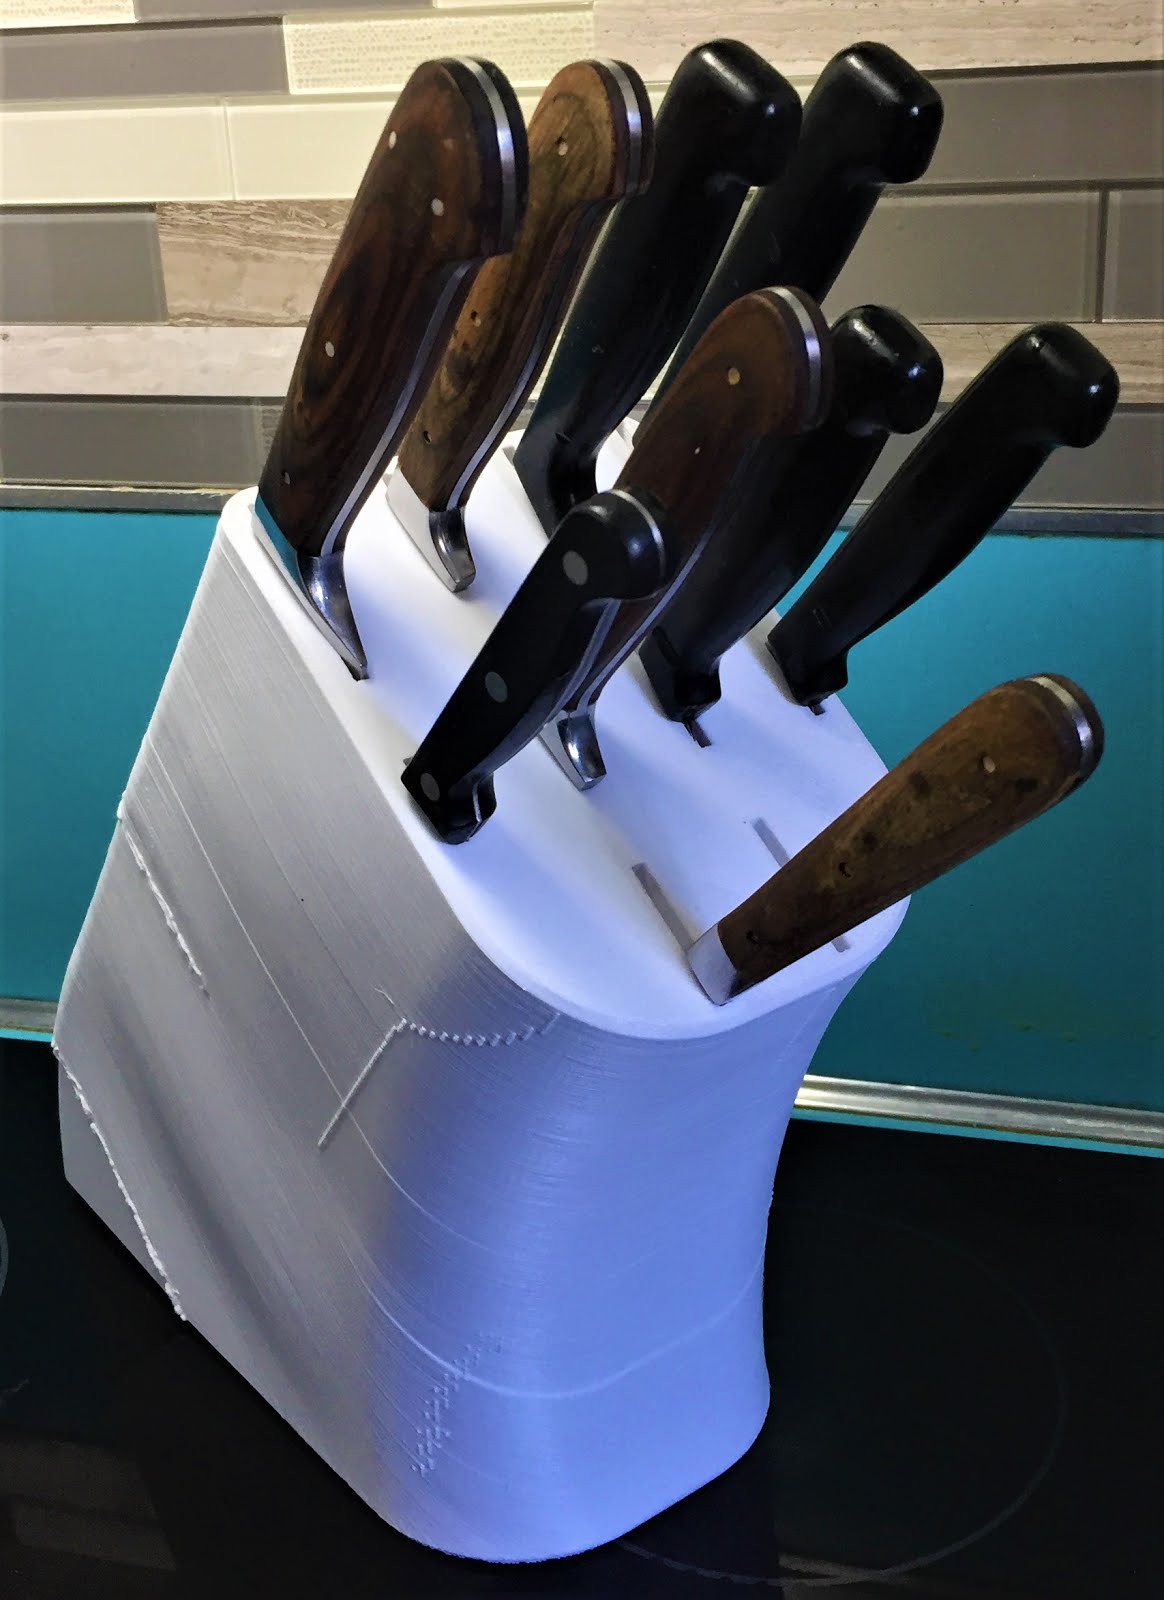
    A few weeks ago I was washing some dishes in the kitchen and noticed the appalling state of the old wooden knife blocks, both were caked with dust and other debris, some seemed to have become ingrained into the finish, so I decided to 3D print a replacement that could actually hold all of the knives in a single block. The first step was looking at the full set to figure out what the basic sizes and styles were, came out as 2 cleavers, 5 regular ones, 2 pairing and 1 carving fork from a couple different sets. Most of them were fairly close in size for each type, so I took the length and width of the larges examples for each, then drew up a layout in Fusion 360.

Kitchen Knife Block in Fusion 360

     One issue that the old blocks had was it was difficult to access the handles for some of the knives due to the slots being tightly spaced, so I measured the handle widths and used double that dimension for the slot offset to fix this issue. Modelling the final form took about a day, then I loaded the model into my slicing program, ran the process with my standard settings and hit a snag. It was estimating over 1kg of PLA to print, and I didn't have any spools that big, so I decided to flip it on end and ditch the infill to see if that helped. It worked and got the weight down to 900g or so, so I turned it loose on the Mega Kossel with an almost full spool of PLA.

Finished Knife Block in use
    After almost 2 days of non-stop printing, it finished at 46 hours and an empty spool of PLA. I'd previously done a couple small prints with the reel, so I actually ended up doing the last 3 cm on the Ender 3 with another spool, then using my 3D pen to weld the 2 sections together. This thing is officially the single longest print I've ever done in the past 4 years, so I'm fairly pleased with how it turned out.

Tuesday, 30 October 2018

Household 3D printing round 3: Lampshades and Gardening

Greenhouse over planter box
     Been busy with helping wind-down the garden and cleaning up for the winter over the past couple of weeks, this included converting one of the beds into a mini-greenhouse. The core materials are 25-30 square meters of transparent plastic sheeting for the shell, a couple of 12 foot lengths of 1 inch plastic tubing and some 1/2 inch electrical conduit (EMT) off-cuts from the old Proteus build. Obviously this collection of components needs some way to connect everything, that's where 3D printing comes in with custom adapters and clamps.


Frame hoop anchor bracket with EMT  connector and plastic tubing.
      The frame is formed from the 1" plastic tubing with the EMT conduit used as corner posts that are anchored with connectors that I'd made for another project over the summer, basically a corner anchor to connect EMT to wood or other sheet material. Installation is fairly simple, two screws hold the bracket down to the planter box, then the EMT gets inserted the bracket and the plastic tube is slipped over the top to form the main arches. Cross bracing is provided by both the outer plastic sheeting and a cross-beam formed from some spare 1" tubing with more custom brackets.


Cross-beam connector in white PLA
     The outer plastic shell is held down by custom clips that clamp onto the 1" tubing in a 270° arc. So far it's stood up to a fairly intense rainstorm with minimal issues, a couple of the clips were overwhelmed by the wind and their position on the frame but it's easy to fix by printing slightly tighter ones for those spots.


Plastic sheet clamping clip in use
     The other project I've been working on is spiral lampshades using parametric design in Fusion 360, mainly as a way to learn more about the program and to replace a couple of ancient dust-trap shades that had gotten impossible to clean.

Twisty Lampshade fresh off the printer
    The form I settled on is a 7-sided cylinder, 25 cm tall and 19 cm in diameter. I started with a lofted form to create the slight curve to the sides and then hollowed it out to have 1.2mm thick sides for optimum light refraction. The material is basic white PLA without any heat-treatments or other modification after printing, and it's held up perfectly fine with an old incandescent bulb in the lamp.


Lamp with incandescent bulb and PLA shade.

Tuesday, 18 July 2017

Summer Project: Upgrading the workshop

Workshop upgrades
     My workspace has been getting into a bit of a mess over the past year, so it was time for a cleanup this summer and I've ended up building a couple small projects to help with reorganizing. One's a cart for the spare that was piling up in one corner, the second is a small router table to help with the third which is a tool chest for storing all the small hand tools.

Wood Cart Concept
     The worst of the mess was, not surprisingly, the wood pile. After watching this YouTube video, I decided that building something like it would be the best solution for my own wood pile. Starting with Fusion 360, I drew up rough plans for a wood cart that could handle anything up to half a sheet of plywood, that's the largest piece of wood that I've got space to work with. After a trip to Home Depot to get some wood for the frame, I ended up building the final cart from a 2'x4' 1/4 sheet of plywood for the base, 4 8'x2"x2" composite posts cut to 5' and 3' sections, 4 casters, and a couple of old IKEA storage boxes that were in the shop. The Fusion 360 file is here.

Wood Cart as built with MPCNC in background
Router Table
    With the wood pile sorted, the next area that needed reorganizing was the hand tools. Previously I had them in the upper trays from some old tool boxes on a long shelf about 12 inches above one of the work benches, didn't work that great with the tools constantly getting mixed up and covered in sawdust. After seeing some YouTube videos of other tool organizing methods, I drew up a concept for a wooden tool chest in Fusion 360. (File)

Tool Chest Concept
     One issue with the design that was immediately apparent was that I'd need some form of jig or tool to cut the slots in the sides for the drawer bottoms, which double as the drawer slides, to run in. I've seen slots like this cut in a few ways on YouTube, a Dado blade set with a table saw or a router table are the most common options. I don't have a dado set but I did have a spare plunge router that was just gathering dust, so I made a simple table for it out of some stuff that was lying around the shop.

Router mounting system
Power management
     I used an old folding worktable for the legs, bolted a 2ft by 2ft square of sanded plywood on for a top. For mounting the router, I used a skill saw to cut a hole in the top that the plunge router would fit through, then used the MPCNC palm router to cut a shallow groove that would allow a 1/4" sheet of hardboard to sit flush with the top, then cut a piece to fit and screwed the router to one side after drilling a 2-inch hole for the bit to pass through. After that it was a simple matter of dropping the router through the hole, sanding the top completely flat, and dealing with the power wiring. Since the plunge router has its trigger mounted on one of the hand grips, I simply used its lock-on function to bypass it and zip-tied an old power bar to the side, plug the router into that and it functions as a on/off switch.

Tool Chest as built
     With the router table complete, it was a simple matter of firing up the table saw and cutting all the pieces of plywood and hardboard to size, using the router table to cut the slots for the drawers, and then screwing everything together. I did use a hole saw bit on the drill press to cut the notches for the drawer handles, but that was basically it for making the tool chest, and I'm very pleased with the result of both projects.

Tuesday, 21 June 2016

3D printing around the house

So I was looking around and realized that I've done a few 3D designs that I'd forgotten about because they're simple everyday objects, so I thought I'd share a couple of them.

Temperature knob on kitchen oven
Tea jar lid
First up is the temperature knob on the kitchen oven. This one is a good example of 3D design being used to replace a unavailable part on old equipment. What isn't visible in the photo is that the control shaft, the metal bar that the knob is mounted on, snapped from fatigue about 0.5 cm behind the faceplate, so I photographed the damaged area, measured the cross section of the rod and it's hole, and combined that with the style of the remaining knobs to create the replacement in the photo. It's glued in place with 5 minute epoxy (Lepage brand I think), and has been working perfectly for about 4-5 months at this point.

The other one is a simple replacement lid for a jar we use to store tea bags, the original ceramic one broke when it got dropped on the floor. Design wise, this one was quite simple to create, I simply measured the diameter of the mouth of the jar along with the width of the lip around it, and used those to create a cylinder with the same diameter as a starting point. The rest was simply making a shape that looked like a nice handle and about 4 hours of 3D printing.